

If you are investing in a sesame oil plant—or you are the technician responsible for stable output—your daily success comes down to one thing: process discipline. A sesame oil production line is not “just pressing seeds.” It’s a connected system where washing quality affects drying, drying affects press stability, and filtration determines shelf life and customer complaints.
This guide walks you through a full workflow (washing → drying → pressing → filtration → automatic bottling), with actionable hygiene controls, maintenance routines, and troubleshooting logic you can apply immediately on the shop floor.
You’ll get the most value from this tutorial if you are:
A properly tuned line typically reaches 1.5–3.0% higher oil recovery (depending on seed grade and press type) and reduces rework from haze/sediment issues by 30–60% once filtration and bottling hygiene are standardized.
RAW SESAME
│
▼
Cleaning & Washing → De-watering (air knife / vibrating screen)
│
▼
Drying (target moisture window)
│
▼
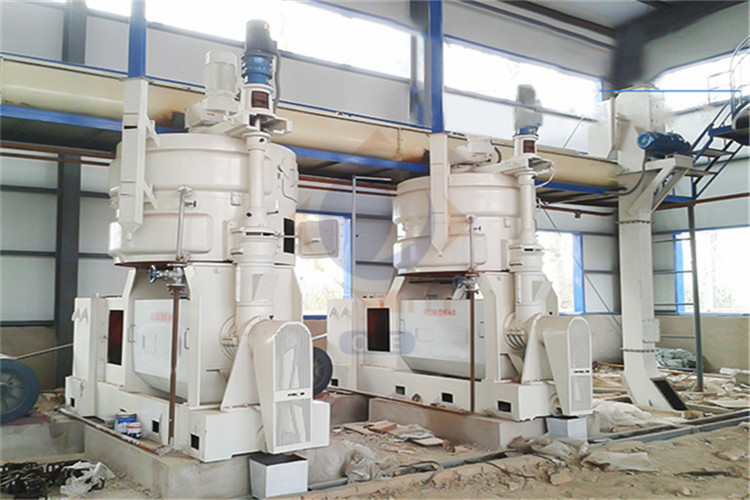
Pressing (temperature, feed rate, pressure stability)
│
▼
Coarse Filtration → Fine Filtration / Polishing
│
▼
Holding Tank (settling + nitrogen optional)
│
▼
Automatic Filling → Capping → Labeling → Coding → Cartoning
The core principle: remove variability early. If cleaning and drying are inconsistent, no filter or bottling line will “save” you later.
Your objective is not only to remove visible dirt. You are protecting downstream equipment (press screw, bearings, filter media) and reducing contaminants that shorten shelf life.
Interactive check: Have you ever seen unexpected black specks or faster-than-normal filter clogging? In many plants, the root cause is incomplete pre-cleaning—tiny stones and dust turn into abrasive wear and fine sediment later.
Drying is where many new operators either overdo heat (creating burnt notes and darker oil) or under-dry (causing unstable cake and poor throughput). Your goal is a repeatable moisture range—not “as dry as possible.”
Interactive check: Do your operators measure moisture at the same time and location every batch? Inconsistent sampling is a silent cause of “mystery” press problems.
In pressing, you’re balancing three variables: feed rate, pressure, and temperature. If you push only for output, you often pay later through faster wear, higher sediment, and off-flavor risks.
For new lines, build a simple shift record: moisture %, press temperature, motor current, output kg/h, and filtration differential pressure. After 2–3 weeks, you’ll have your real baseline—and troubleshooting becomes data-driven, not personal opinion.
Filtration is where you “lock in” product consistency. Many buyer complaints—cloudiness, sediment at the bottom, taste drift—trace back to poor filtration setup or rushed filter changes.
Interactive check: Do you experience “clear at filtration, hazy in bottle after 3–7 days”? That pattern often indicates temperature fluctuation, micro-sediment, or contamination introduced during holding/filling—review your transfer hoses, tank lids, and filler nozzles.
Bottling is where your product becomes a customer experience. The cleanest oil can still fail in the market if fill levels vary or caps leak in transport. Your focus should be sanitary design plus repeatable accuracy.
Define wet zone (washing), dust zone (seed transfer), and clean zone (post-filtration). Assign tools and PPE per zone to prevent cross-transfer.
Implement a daily checklist: contact surfaces, gaskets, filter housings, filler nozzles. Use sign-off + random verification (ATP swabs where appropriate).
Install magnets and screens at critical points; control packaging debris near the filling line. A single broken gasket fragment can become a serious complaint.
Interactive check: When you investigate a defect, do you trace it to a step and record a corrective action? The plants that improve fastest treat every issue as a “process signal,” not a one-time accident.
A mid-size edible oil workshop implementing simple SOP cards (moisture targets, filter DP triggers, sanitation zoning, and shift records) typically sees measurable changes within one month:
The key is consistency: you don’t need “perfect” equipment on day one—you need repeatable control points that the team follows even on busy shifts.
If you want a line that’s easier to run, easier to clean, and easier to scale, the right configuration matters: cleaning efficiency, drying uniformity, press stability, filtration design, and a bottling section built for sanitary operation.
Get a tailored process layout, recommended capacity range, and a practical maintenance plan that fits your site and team.
Typical response time: within 24 hours on business days.
 398
|
398
|
 cold-heat dual-mode pressing
hydraulic pre-press oil machine
oilseed pressing optimization
improve oil yield
industrial hydraulic oil press
107
|
closed-system sesame oil production line
automated sesame oil pressing
sesame oil filtration technology
sesame oil quality control
energy-efficient oil processing equipment
423
|
medium screw oil press machine
screw oil press working principle
structural optimization for oil press stability
integrated preheating and pressing oil extraction
energy-efficient vegetable oil pressing
300
|
rice bran oil refining equipment
core component material selection
corrosion resistant stainless steel for edible oil plants
automated rice bran oil refinery line
edible oil equipment after sales service
cold-heat dual-mode pressing
hydraulic pre-press oil machine
oilseed pressing optimization
improve oil yield
industrial hydraulic oil press
107
|
closed-system sesame oil production line
automated sesame oil pressing
sesame oil filtration technology
sesame oil quality control
energy-efficient oil processing equipment
423
|
medium screw oil press machine
screw oil press working principle
structural optimization for oil press stability
integrated preheating and pressing oil extraction
energy-efficient vegetable oil pressing
300
|
rice bran oil refining equipment
core component material selection
corrosion resistant stainless steel for edible oil plants
automated rice bran oil refinery line
edible oil equipment after sales service


